Thursday, May 26, 2011

Apparently I Like This Style


Because I was pleased with the outcome of Simplicity 3835, I thought I would go through my pattern stash and find another 1940s pattern to work on.  As, I went through the boxes, I found this one:


Hmmmm…it looks familiar………


In fact, doesn’t it look rather like this one?
 

You know, the one I just finished?

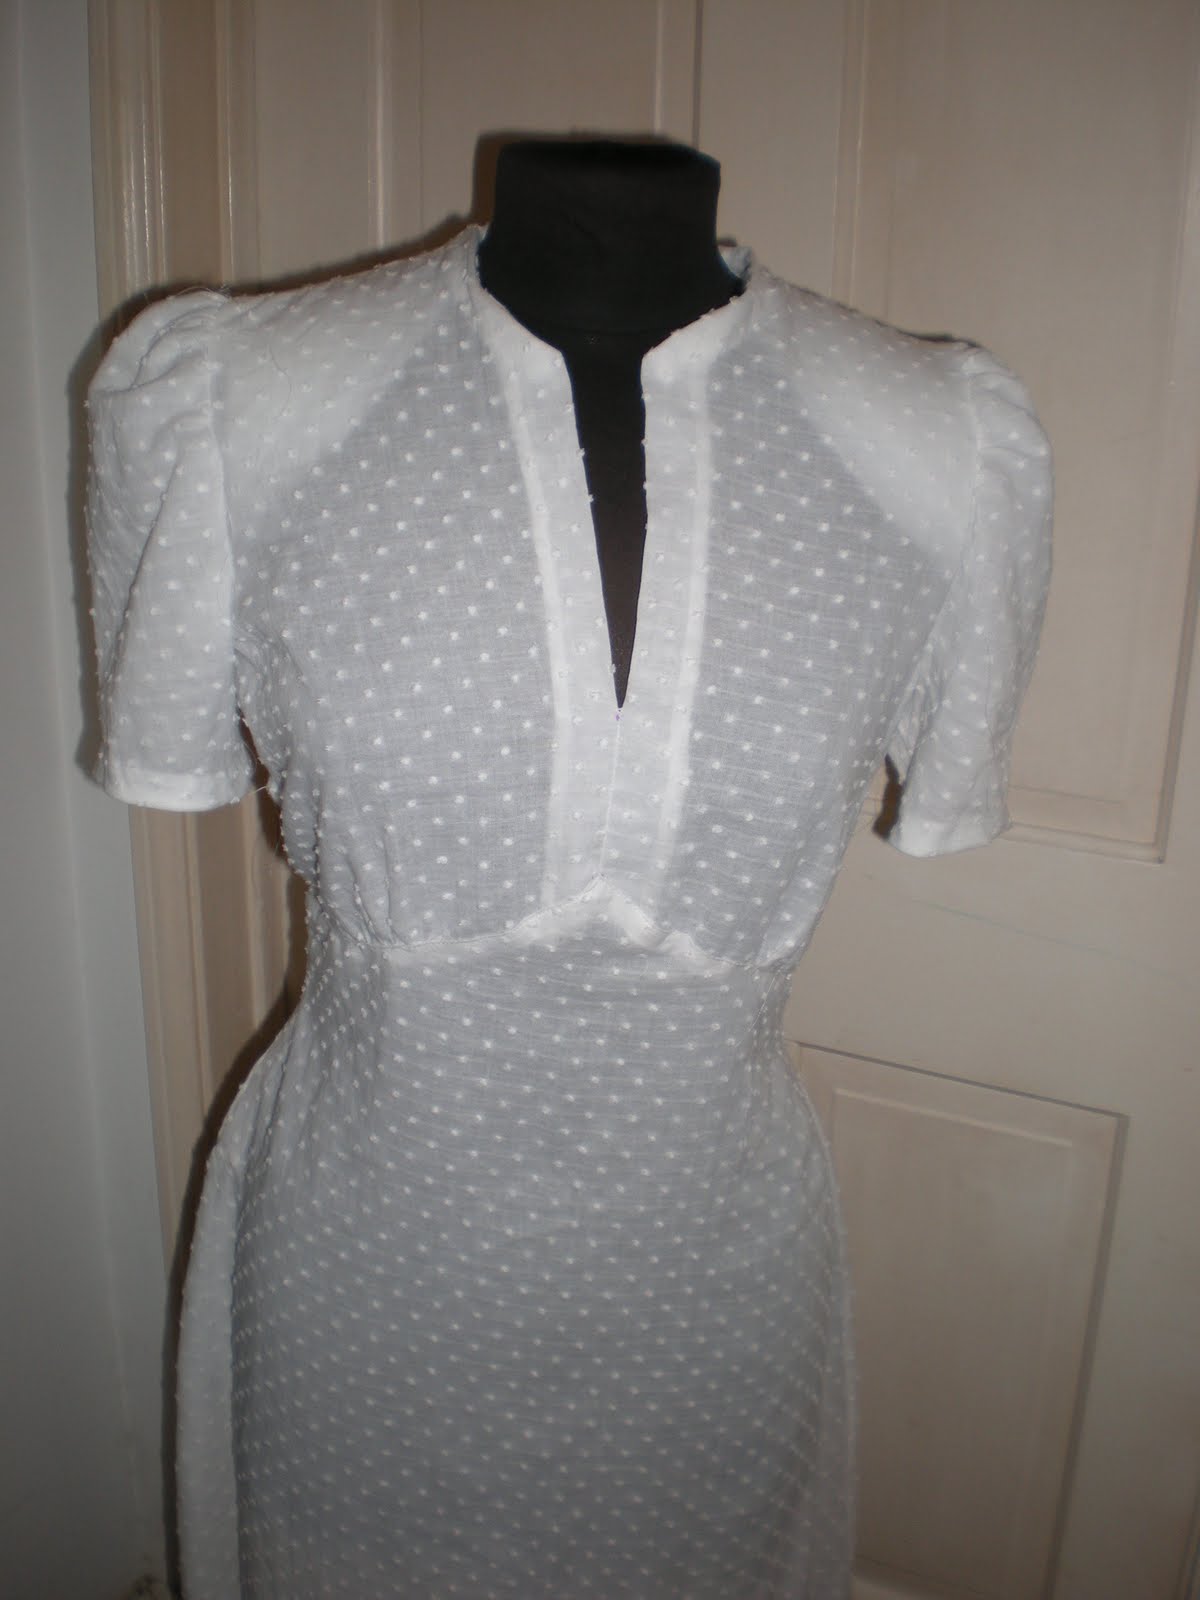
Okay, so there are some slight differences but the effect is really the same:
            Butterick has a 4 gore skirt and Simplicity has a 2 gore skirt
            Simplicity has ties and the Butterick has a sash
            Butterick has a variety of neckline options, Simplicity does not  
           Simplicity has gathers at the bust, Butterick has gathers at  the shoulders
           Simplicity is a little shorter


I never looked at these two patterns together.  I had the Simplicity pattern for AGES!  The Butterick pattern I bought last year for a lot of money at a vintage show.  I saw it and HAD to have it.  Hmmmmm…..I guess I really like this style.  My first instinct was that I need to make up the Butterick pattern now.

However, I have decided not to make a clone but try something different.  Off to continue my search through the patterns. 

Tuesday, May 24, 2011

Such A Lot of Plackets


The dress is complete except for the little things such as whether a bow or a button to close the top of the bodice.  The pattern suggests a bow; I think so buttons may be nicer.  Not sure, will decide tomorrow.

What can I do to spice this
up???
So putting the last bits together were time consuming because there was such a lot of hand sewing.  The neck and sleeves are finished with bias binding facings.  I think the look is more finished than a regular facing and may have to incorporate this trick into other projects.  There are also plackets on both sides of the dress.  There is a small opening on the right, a couple of inches, and a larger on the left.  Both openings required 2 plackets for each side which results in even more hand sewing.
Mmm...puffy sleeve

The sleeves were a breeze.  Since they are supposed to be gathered, there was not the fussing over the excess ease that I normally engage in.  This dress requires shoulder pads…hey it was the 40s!  But I cheated, I used some shoulder pads I bought at a tailoring shop.  The pads are a little big but do give the correct silhouette. 

Now do I make a slip or use one I already own.  Hmmmm decisions decisions.  I have to wear this dress on Sunday so I need to decide fast.  Maybe tomorrow I can get a picture of the dress on,…depending on how the day goes.

Monday, May 23, 2011

Could It Get ANY Easier?


 I want to thank Debi for chiming in on the likely date of this pattern.  She really confirmed what I thought!  And, of course if you have not read her blog...well you need to do so immediately!

I really do not think so!  So far, working with Simplicity 3835 has been a joy.  Simple and quick to put together.  The hardest bit so far has been pattern adjustments and those were merely tedious and time consuming.

Pattern adjustments included an FBA….it was needed this time.  Also increased the width of the skirt pieces by a couple of inches.  I left the back piece alone because it fit but if I were to make this again, I would add a smidge to the lower portion of the back piece so that it would be easier to ease into the back skirt piece.  I also made the ties double...I had the fabric and it looks more finished to my eye this way.

This has gone together so quickly, I wanted to do a marathon sewing day so I would just finish it. However, a clearer mind won out; no need to get tired and make silly mistakes.  Also, even though not done, I am thinking of making this pattern up again in a more practical fabric.

Construction is unusual for me.  The pattern has you make the front first, then the back and then you put it all together!
Love the v at the waist

Front


Back


Side
 
You can see how the front
is sewn completely before the back


The skirt is attached to the bodice using a technique you see all the time in 1930s patterns: fold over the seam allowance and top stitch on.  It was really easy after the flat fell seams of last week!  To do this, I measured and measured.  I also marked the placement on the bodice with one of those funky air erasing pens.  On the back, I hand pasted the skirt onto the bodice before sewing it on.  I did not do that with the front but if you have to do this technique, I recommend the hand basting.  It really does save time.

Sunday, May 22, 2011

Next – 1940’s Dress


I love the fashions of the 1940s almost as much as the 1930s; however, I do not make a lot of 1940’s wear.  I have a number of patterns but have not been good about getting to them.

So next up is this 1940s dress: Simplicity 3835.  The short version; the long version is a nightgown.

I have no idea when this pattern came out.  It looks early 40s to me but on vintage pattern wikia it is listed as the late 40s.  Any ideas???

This is going to be done in a white swiss dot since I have yards and yards of this fabric in the stash.  I think I purchased 10 yards last year.  The pattern is small in the waist for me but weirdly the stated hips are big enough to fit mine.  So, some pattern adjustments will be in order!

Hopefully I will have more success than with the 1940s skirt!

Steampunk in Action

Gah... love those big skater thighs!

I wore my steampunk outfit and got a lot of compliments on the skirt.  In fact, most people thought that I had bought the skirt asking what store carried the skirt and what an excellent find.  Could it be the dreaded flat fell seams were worth it? 

Interesting that the ultimate compliment is that what you made looks like RTW when the whole point of sewing is to be more creative and have better fitting clothes than RTW.  I find this to be a mental conundrum.


What's up next?  A little dress from the 1940s.

Friday, May 20, 2011

Something Pithy


Mmm....pithy!

That is a pith helmet to go with the steampunky skirt. 

This is a short and sweet re-fashion.  I found a cheap old, not very nice pith helmet at a thrift store.  Then I covered the whole thing in a coordinating green mesh and tacked it up under the brim.  Then I sewed on the tulle which will match the blouse I wear with it.

I still feel light on accessories but this will have to do! 

Thursday, May 19, 2011

One Steampunk Skirt Done


 Even with redoing ever flat fell seam at least once  and with absolutely no instructions the skirt is finished. 


In process: dealing with evil
pleats!!
There were many hair pulling moments but I am not dissatisfied with the end result.  The pleats were another issue.  I cannot get my head around how to make pleats.  I mean I know how to do it in theory and I did it for the brown skirt.  However, it takes me a hours to get them to work correctly.  The first time I tried the pleats, I did them completely backwards.  Thank goodness I had only basted them in!

Back of skirt and
yoke.
I added the yoke and added some hooks on some self fabric strings I made.  Adding the grommets to the back of the yoke was almost a fail.  The grommets I have just were not working but then I found some scrapbook grommets which did work.  Whew.

Close up of buttons and
the hooks
I found the buttons in the same store as the hooks.  I love the buttons!! My sewing machine did not love putting in the button holes!  In fact, the machine came to a halt when there were 5 buttonholes left.  Only after a significant rest was the machine able to trundle on. 

I would like to add a few more utility strings.  I have 2 more hooks and a bunch of D rings that I could add to the skirt. 

While I like the resulting skirt, I cannot recommend this pattern if you do not have a lot of sewing experience.  Not only do you need to figure out what order and how to put the outfit together, you need to determine what facings you will need and construct them.  Pattern instructions are a security blanket for me.  I feel safe knowing that if I run into problems, I can just refer to the instruction.  Here, I was flying without the net and as I put this skirt together I kept wondering if I was doing things correctly.  The seam ripper was used more in this project than any other project for a long while.  

Monday, May 16, 2011

It Seamed Like a Good Idea


I would like to thank Leah for suggesting I check out her blog for some steampunky inspiration.  Totally cool and very inspiring!

In my world, I had to make the skirt larger because of the 25 inch waist issue, I also made the pattern a little longer because it was hitting at my ankles which did not allow for a hem.  While I was cutting the pattern out, the fabric was unraveling like crazy.  At first I thought I would serge the seams but then I got the brilliant idea to make flat fell seams which would enclose the raveling bits. 

Yeah…great idea except for the 3/8ths seam allowance.  Have you ever tried flat fell seams with such a small seam allowance??  If you were successful, I want to know your secret.  If not, you can sympathize with me.  Ugh, I could not make it to work so I picked out all the seam and re-sewed them with a 4/8ths seam allowance.  Now the flat fells seams were easier mind you, but not easy.  What a bother though I do love the look!

Sunday, May 15, 2011

Steaming it up


So next on the agenda is a steampunk outfit for an outing with friends.  I really do not get steampunk for women; it seems to me it is just Victorian wear in brown or khaki.  After much research, I found that steampunk wear goes as far forward as WW 1 so I am throwing out the Victorian and will go for something Edwardian.

Looking around the internet, I found a free Edwardian walking skirt pattern and thought about using that pattern.  But then I remembered that a couple of years ago I bought this pattern; the pattern is dated 1905 on the information provided in with the pattern (but on the website it is dated as 1914…who knows what to go by)  so a good time period for this outfit.  I have no idea what I was thinking when I ordered this pattern, much to young for me.  But the skirt portion I can use!  And since I have it in hand, that is what I am going to do.

I have a very heavy army green brushed twill, rather a denim weight, which I will use for the skirt.

I plan to do the view with the buttons down the front and the corset type yoke.  I think I can make those details kind of steampunky!!  The only problem is that this pattern has a 25 inch waist and I do not.  I will need to grade up the pattern a little bit to make it work on me.

Friday, May 13, 2011

When is a Vintage Dress Not a Vintage Dress?


This is a question that came to mind the other day. 

A couple of days ago, I was running errands wearing the Jerry Parnis Dress.  While out and about, I was stopped and asked about the wonderful vintage dress I was wearing!

What a nice compliment.  I answered that it really is not a vintage dress but it was made with a vintage pattern.

But I have wondered if my response was wrong.  Are the outfits we make from vintage patterns vintage outfits??  If you use vintage fabric in addition to the vintage pattern, does that then make the outfit vintage even if you made it in 2011?  Or does the fact that the outfit was made in 2011, never mind the age of the pattern, mean it is a modern outfit or a modern interpretation of vintage wear?

I have no answers to these questions.  I can see the argument for each.  I tend to think that if I made the dress now, in the modern age, it cannot be vintage.  However, I do not like the term vintage inspired because that is not wholly accurate either.

Perhaps next time, I should merely say thanks and that I found a new vintage store without further explanations.  Any thoughts? 

Tuesday, May 10, 2011

First Sundress of the Season


 I managed to finish up Simplicity 1620.  Boy do I like wearing full gathered skirts.  I do not, however, like attaching them to a bodice or hemming them!  What is worse is when your camera disappears for days so you cannot document the finished product.  Found the camera and here I am.
Love the piping.

Without petticoat
Attaching the skirt was problematic magnified by my lovely piping.  Getting the skirt to lay nicely after being sewn required a couple of tries.  I did not use a waist stay because the selvedges are at the waist.  There should be no stretching of the waist.

I used an invisible zipper because that is what I had on hand.  Went in easily, by hand.

Hemming the skirt was another matter entirely.  I expect putting in the zipper to be a slow process because I need to make sure everything turns out lined up.  However, hemming should be quick and easy.  What with measuring, pinning, ironing and actually sewing, I must have spent no less than 3 hours on the skirt hem.  Probably more.  Just the sewing of the hem took over an hour and a half.  Yuppers, I timed myself and I felt as if I was sewing rather fast.
Self timer catches me in action.
Here you can see there is quite a bit
of ease through the lower part of the
bodice even without the FBA.

Once I found the camera, I tried the self timer function to get pictures of the dress being worn.  Wow was that something.  It turned out better than I thought….though the first couple of tries did not include full bodies.  I found a place in my front yard where I could achieve that.


Yes, there is a street light in my front yard.
It was put there by a previous owner
and it is kinda goofy and kinda cool.


I am wearing the dress with a petticoat but not a very full petticoat.  It should look better with the fuller petticoat.  Note to self: make bigger petticoat.  Oh, yeah, I have one half finished.  Better get on that!

My thoughts on this Simplicity pattern - nice and easy.  I had read some horror stories about vintage Simplicity patterns and I did not have a problem with the pattern or fitting.


Saturday, May 07, 2011

Piiping


I wanted to do something to set off this dress and finish it nicely.  So I thought contrasting corded piping.  That might have worked if my brown was even close to the color brown in the print.  It would have been smart to have checked before making the piping.  Nope, I just whipped up a load of brown piping which will have to be used for something else!

Front view.  See the facing
bunching up?
So, same fabric piping here we come.
Close up of piping.


I have piped the armholes and neckline.  My distaste of facings raised its head again.  The neckline facing was not laying correctly.  Then it hit me…duh….I forgot to clip and trim the seam allowance.  No wonder it was all bunchy!  I used bias binding to finish the armhole area.
Back view.  How do I get everything
so very wrinkled as I sew?

I like the piping and plan to put it in the waist seam as well.

Thursday, May 05, 2011

Tacos and Sewing for Cinco de Mayo


Back bodice with patch.
Any excuse to have Mexican food and margaritas..... and Cinco de Mayo is a good one IMHO.  Being full from my large meal, this will be a short post so I can go to sleep.  I didn’t actually have tacos but a plate of camerones de ajo….yum!

I decided to go with option number 2 to fix the back bodice – make a small patch.  Since I plan to pipe the waist, it should not be too noticeable.

Front.. but look over there....
Hey, wait...this is the back.  See the same!
I just noticed my back and front bodice are have the same pattern placement.

Wednesday, May 04, 2011

The One Where There is a Cutting Failure


After about another hour or so measuring my fabric, I determined that I had enough yardage to make the dress as patterned but only if I cut everything on the cross grain.  I would end up with a shorter skirt but since I am shorter than average, a shorter skirt was not something I was worried about.

I traced the front bodice onto the fabric in an effort to cut down on inappropriate flower placement.  I really did not want  a boob bull’s-eye!  I cut out the front bodice with no problem.

It is not even!
It was the back bodice that became the problem.  I do not know how or why this was a problem.  I tried to trace the pattern and I could never get it to line up.  So I folded over the fabric, no bull’s-eyes issues for the back and cut it out.

Whoops…….

Can you see the problem?  


One side is shorter than the other, not by a lot but enough to make back bodice not work.  

How did this happen?


I know it wouldn’t work because I tried.  I sewed it together and it twisted and was too short.  I tried reducing the seam allowance on the shoulders, no help.  Is the print off grain?  I really have no idea.

Having just enough fabric to cut out another back bodice, I was finding that I had the same problem.  I could not get it even.  So what to do???

After thinking about this for a long time, I figure I have only 2 options. 

1.  Move the zipper to a back zipper and slice the bodice up the back.  Keep the good side and get another side to work.

2.  Make a small patch for the problem area.

Changing Gears


Yum! Turquoise and brown - perfect
for a sun dress.
Because the 1940’s skirt was giving me a headache, I decided to work on something a little more fun.  I wanted to use this fabric.

But what pattern.   Trolling through my patterns and pulling out a few maybes, I finally went with View 2 of Simplicity 1620.  I only had a couple of yards of fabric and thought not only will I be able to get this dress out of the yardage I had but also it would show off this Hawaiian print.  As you have probably already noticed, I love a Hawaiian print.  Note, this is the FIRST Simplicity pattern I have attempted.

This scan if from the vintage
pattern wikia.  Mine has a
32 bust and a ripped envelope.
I traced off the pattern and then started measuring my yardage. I measured and measured and measured some more.  I had barely enough fabric to make this dress.  Granted, I could make the skirt less full but what is the fun in that?

So to be a little different and because of the lack of excess fabric, I made a muslin of the bodice….actually, I made 2 muslins of the bodice.  First muslin included a FBA.  It was HUGE!!  I showed sewing friends who confirmed it was way too big for me.  So, I quickly whipped up another muslin.  Second muslin did not have an FBA and it fit perfectly per the consensus of the group!

What is happening here?  This is the second mid-1950’s dress that did not require an FBA.  Hmmmm …..does this mean I should only wear clothes from this era?  Were patterns built for a C cup?  Interesting development and totally taking me by surprise.  Has anyone else found this to be true? 

Monday, May 02, 2011

Sewing ADD

I saw a lot of peacocks this weekend.
This fellow followed me and shook his feathers at me
As I walked away,
he then started to follow me.


What do I do when my project is not going well?  Do I stay with it?  Do I work through the problems.

No silly me, I start a bunch of other projects. 

My new motto:  When a project goes horribly awry, just start something else!! And ignore any UFOs that are formed.

My current list:

Then he opened up and
shook his feathers at me again!
1.  The 1940’s skirt;  I am baffled on how to fix and therefore paralyzed.  Blech.  I swear I have not yet given up. 


2.  Started a summer sundress that has had problems from the cutting out stage.  My fault but still it is aggravating.  Seriously, I tend to think this dress is cursed.

A little later, I ran into this fellow
showing off his backside.  Just in case you
wondered what the backside of a
peacock looks like.
3.  Gala outfit.  Traced off the bodice pattern that I need to adapt to muslin.  But then started having nightmares about the project so moved on.  Will have to buckle down…at some point…since I need it in July.


But then he turned around to show off his
plumage
4.  Steampunk skirt: Decided on a pattern but have not yet traced off the pattern because I am now overwhelmed by what I have on my agenda.


Another hiding behind the fountain

I mentioned the nightmares didn’t I?  Yup there it is in item 3.  The nightmare I am having is that I only have 24 hours to complete the project.  


Peacocks in lieu of actual sewing pictures.  Prettier too!